Connecting Azure Databricks to Azure SQL Database Using JDBC: A Hands-On Guide (1/2)
JDBC (Java Database Connectivity) provides a standardized way to establish connections with relational databases. In simple terms, it acts as a bridge that allows different systems or tools to communicate with a database. Its functionality isn’t limited to databases alone, any data source that stores structured data can often be accessed via a JDBC connection.
In on-premises tools and environments, it’s mandatory to install the appropriate JDBC driver to connect with the desired data source. However, when working with Microsoft Azure Databricks, here’s an interesting fact:
Databricks comes with JDBC functionality pre-packaged
This means you don’t need to manually install or configure any JDBC drivers to connect with databases such as Azure SQL Database.
In the following demo, I’ll show how JDBC works within Azure Databricks, and how easily you can establish connectivity between Databricks and Azure SQL Database.
Scenario:
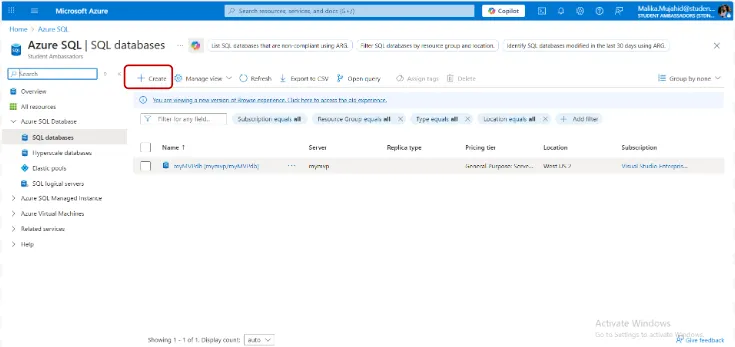
I’ve already completed the initial setup of both Azure SQL Database and Azure Databricks within my Azure environment. The next step is to establish a secure and reliable connection between these two services.
The goal is to enable data movement and transformation, allowing Databricks to read data from Azure SQL, perform transformations or analytics, and write the processed results back to the database.
By setting up this connection, I can seamlessly use Azure Databricks for advanced data engineering workflows such as ETL (Extract, Transform, Load), data cleaning, and performance optimization, all while leveraging the scalability of Azure SQL Database for storage.
Before establishing the connection, we need to define the key JDBC connection parameters that tell Databricks which database to connect to and how.
In this case, we’ll create variables for the following components:
jdbcHostname: the server name of your Azure SQL instance
jdbcPort: the port used for SQL connections (default is 1433)
jdbcDatabase: the specific database you want to connect to
jdbcUsername: your database login username
jdbcPassword: your login password (later i will cover how this can be securely stored using a secret scope instead of hardcoding)
These variables together define the foundation for your connection string.
Once these are set, we’ll combine them into a JDBC URL, a standardized string that Spark uses to identify how and where to connect.
The JDBC URL acts as the connector that tells Spark which source it’s interacting with, in this case, a Microsoft SQL Server–based Azure SQL Database.

Now that the connection parameters are set, we can use Spark’s JDBC integration to read data from our Azure SQL Database directly into a DataFrame.
To do this, we’ll use the spark.read function, followed by .format(“jdbc”) to specify that the source is a JDBC-compatible database. We’ll then pass in a few key options using the .option() method including:
url → the JDBC URL we built earlier
dbtable → the name of the table we want to read
user and password → credentials for authentication
Get Malika Mujahid’s stories in your inbox
Join Medium for free to get updates from this writer.
Finally, we’ll use .load() to execute the read operation and load the results into a Spark DataFrame.

Spark provides two ways to define connection parameters:
Using a single .options() method, where you can pass all parameters together as a dictionary(as shown above).
Using multiple .option() calls, one for each key-value pair, like this:
df = (spark.read
.format(“jdbc”)
.option(“url”, jdbcUrl)
.option(“dbtable”, “[SalesLT].[Customer]”) # Table to read
.option(“user”, jdbcUsername)
.option(“password”, jdbcPassword)
.load())display(df)
Once we’ve successfully read data from Azure SQL into Databricks, we can also perform write operations to push transformed or newly created data back into the database.
The syntax for writing is almost identical to the read operation, the only addition is the .mode() function, which controls what happens if the target table already exists. The .mode() function defines how Spark should handle existing data in the target table.
Here’s an example of writing a small sample Data Frame back to Azure SQL:

Mode Description:
overwrite: Replaces the existing table or its contents with new data.
append: Adds new rows to the existing table without deleting existing data.
ignore: If the table already exists, no data is written, and no error is thrown.
error (default): Throws an error if the target table already exists.
Here’s what wecovered so far:
- Setting up connection variables like hostname, port, database, username, and password.
- Building a JDBC connection URL to establish a secure bridge between Databricks and SQL.
- Using Spark’s .read() and .write() methods to interact with SQL tables.
- Understanding how the .option() function helps configure each connection parameter effectively.
Although the final write operation couldn’t be executed due to temporary Azure credit limits, the foundation for full integration is already in place.
In Part 2, I’ll continue from here, verifying data written back into Azure SQL and performing end-to-end data transformations within Databricks.
Happy Learning ;)
Linkedin: Malika Mujahid | LinkedIn