Secure Terraform CI/CD with GitHub Actions: AWS OIDC, Plan/Apply Workflows, and Manual Deployment Approvals

Build a secure, approval-controlled Terraform deployment pipeline using GitHub Actions, AWS IAM OIDC authentication, and reusable Terraform execution plans.
1. Introduction
Infrastructure as Code (IaC) has transformed how cloud infrastructure is provisioned and managed. Tools like Terraform allow engineers to define, version, and deploy infrastructure consistently across multiple environments.
However, automating infrastructure deployments introduces important security considerations.
How do we securely authenticate GitHub Actions to AWS without storing long-lived credentials? How can we ensure infrastructure changes are reviewed before deployment? And how can we guarantee that the Terraform configuration reviewed during the planning stage is the same configuration applied to AWS?
These are common challenges when implementing Terraform CI/CD pipelines.
In this hands-on tutorial, we’ll build a secure Terraform deployment workflow that addresses these concerns using:
- AWS IAM OpenID Connect (OIDC) for temporary, federated AWS authentication.
- GitHub Actions to automate Terraform validation, planning, and deployment.
- Terraform plan artifacts to preserve the exact execution plan between pipeline jobs.
- GitHub Environment Protection Rules to require manual approval before infrastructure changes are applied.
- AWS S3 for a simple infrastructure example, with S3 used for remote Terraform state.
By the end of this tutorial, you’ll have a GitHub Actions workflow that generates a Terraform execution plan automatically, pauses for approval, and applies the previously generated plan only after an authorized reviewer approves deployment.
What we’re building
Our pipeline will consist of two jobs:
- terraform-plan: Authenticate to AWS, initialize Terraform, validate the configuration, generate a saved execution plan, and upload it as an artifact.
- terraform-apply: Wait for approval through the protected dev environment, download the saved plan, and apply it without generating a new plan.

Pipeline Architecture

This design creates a clear separation between planning and deployment.
The plan job identifies infrastructure changes, while the apply job executes those changes only after approval.
2. Configure AWS OIDC Authentication
Why use OIDC instead of AWS access keys?
Traditionally, GitHub Actions workflows authenticate to AWS using access keys stored as GitHub secrets.
Although GitHub encrypts repository secrets, long-lived AWS credentials introduce additional operational and security risks.
These credentials must be rotated, can be accidentally exposed, and may remain valid until explicitly revoked.
AWS IAM OIDC federation provides a more secure alternative.
Instead of storing permanent AWS credentials in GitHub, GitHub Actions requests a short-lived OIDC token. AWS validates the token and allows the workflow to assume an IAM role using AWS Security Token Service (STS).
The result is temporary AWS credentials scoped to the IAM role’s permissions.
Step 1: Create the GitHub OIDC provider in AWS
Navigate to:
AWS Console → IAM → Identity providers → Add provider
Configure the following:
Provider type: OpenID Connect
Provider URL: https://token.actions.githubusercontent.com
Audience: sts.amazonaws.com
Save the provider.

Step 2: Create an IAM role for Terraform deployments
Next, create an IAM role that GitHub Actions can assume.
For this tutorial, we’ll use:github-actions-terraform-role
The role requires two components:
- A trust policy defining which GitHub Actions workflows can assume the role.
- An IAM permissions policy defining which AWS resources Terraform can manage.
Step 3: Configure the IAM trust policy
The following trust policy allows the main branch of a specific GitHub repository to assume the role.
Replace the account ID, GitHub organization, and repository name with your own values.
{
  "Version": "2012-10-17",
  "Statement": [
    {
      "Effect": "Allow",
      "Principal": {
        "Federated": "arn:aws:iam::123456789012:oidc-provider/token.actions.githubusercontent.com"
      },
      "Action": "sts:AssumeRoleWithWebIdentity",
      "Condition": {
        "StringEquals": {
          "token.actions.githubusercontent.com:aud": "sts.amazonaws.com",
          "token.actions.githubusercontent.com:sub": "repo:YOUR_ORG/YOUR_REPO:ref:refs/heads/main"
        }
      }
    }
  ]
}
This configuration restricts access to workflows running from the specified repository and branch when their OIDC subject matches that branch reference.
Important: Our apply job will use a GitHub environment named dev. When a job references a GitHub environment, its default OIDC subject changes.
Instead of:
repo:YOUR_ORG/YOUR_REPO:ref:refs/heads/main
The subject becomes:
repo:YOUR_ORG/YOUR_REPO:environment:dev
{
  "Version": "2012-10-17",
  "Statement": [
    {
      "Effect": "Allow",
      "Principal": {
        "Federated": "arn:aws:iam::123456789012:oidc-provider/token.actions.githubusercontent.com"
      },
      "Action": "sts:AssumeRoleWithWebIdentity",
      "Condition": {
        "StringEquals": {
          "token.actions.githubusercontent.com:aud": "sts.amazonaws.com",
          "token.actions.githubusercontent.com:sub": [
               "repo:YOUR_ORG/YOUR_REPO:ref:refs/heads/main",
               "repo:YOUR_ORG/YOUR_REPO:environment:dev"
           ]
        }
      }
    }
  ]
}
For stronger isolation, production environments should ideally use separate IAM roles with more restrictive permissions.
Also configure GitHub’s dev environment deployment branch restrictions to allow only main. The environment-based OIDC subject does not independently restrict the branch.
Step 4: Assign AWS permissions
Attach an IAM policy granting Terraform the permissions needed to manage the resources in your configuration.
For example, a pipeline provisioning S3 buckets requires the corresponding resource management permissions, as well as access to the Terraform remote state backend.
Avoid using AdministratorAccess for production deployments.
Instead, create a least-privilege policy based on the AWS services and API actions Terraform needs.
Step 5: Configure the AWS role in GitHub
Navigate to:
GitHub Repository → Settings → Secrets and variables → Actions → Variables
Create the following repository variables:
AWS_ROLE_ARN: arn:aws:iam::123456789012:role/github-actions-terraform-role
AWS_REGION: us-east-1

The role ARN is an identifier rather than a secret, so storing it as a repository variable is appropriate.
We’ll reference these values in the GitHub Actions workflow.
3. Create the Terraform Plan Job
Why separate Terraform plan and apply?
A common Terraform workflow runs the following commands sequentially:
terraform init
terraform plan
terraform apply -auto-approve
While this approach may be convenient for development, it provides limited control over infrastructure changes.
A more controlled pipeline separates planning from deployment.
The plan job evaluates the proposed infrastructure changes and produces a saved execution plan.
The apply job later executes that saved plan after approval.
This design provides three important benefits:
Visibility: Engineers can inspect planned infrastructure changes before deployment.
Control: Deployment requires explicit authorization.
Consistency: The apply job uses the same saved plan generated earlier, rather than recalculating the changes.
Step 1: Create the Terraform configuration
For this demonstration, we’ll provision a simple AWS S3 bucket using Terraform.
Create the following repository structure:
terraform-github-actions/
├── .github/
│   └── workflows/
│       └── terraform.yml
├── terraform/
│   ├── backend.tf
│   ├── main.tf
│   ├── providers.tf
│   └── variables.tf
└── .gitignore
providers.tf
terraform {
  required_version = ">= 1.6.0"

  required_providers {
    aws = {
      source  = "hashicorp/aws"
      version = "~> 5.0"
    }
  }
}

provider "aws" {
  region = var.aws_region
}
variables.tf
variable "aws_region" {
  description = "AWS region for deployment"
  type        = string
  default     = "us-east-1"
}
main.tf
resource "aws_s3_bucket" "demo" {
  bucket = "replace-with-your-unique-demo-bucket-name"

  tags = {
    Environment = "dev"
    ManagedBy   = "Terraform"
    Project     = "GitHub-Actions-Demo"
  }
}
Replace the bucket name with a globally unique name.
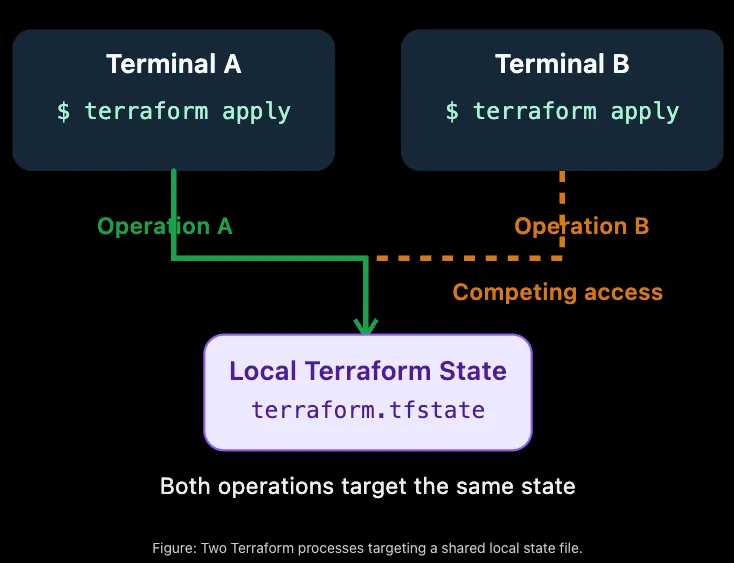
Step 2: Configure remote Terraform state
Terraform uses state to track infrastructure resources and determine which changes are necessary.
For CI/CD deployments, storing state locally on ephemeral GitHub-hosted runners is not appropriate.
We’ll use an S3 backend.
backend.tf
terraform {
  backend "s3" {
    bucket       = "replace-with-existing-state-bucket"
    key          = "github-actions/dev/terraform.tfstate"
    region       = "us-east-1"
    encrypt      = true
    use_lockfile = true
  }
}
The backend bucket must already exist before running the pipeline.
S3 native state locking with use_lockfile = true requires a Terraform version that supports it, such as Terraform 1.10 or later. Ensure the deployment role has the necessary S3 permissions for the state object and lockfile.
For this example, we’ll use Terraform 1.14.x and commit the generated .terraform.lock.hcl dependency lock file.
Enable bucket versioning and restrict access to the state bucket. For production environments, consider additional encryption and audit controls.
Step 3: Create the GitHub Actions workflow
Create:
.github/workflows/terraform.yml
We’ll start with the Terraform plan job.
name: Terraform CI/CD

on:
  push:
    branches:
      - main
    paths:
      - "terraform/**"
      - ".github/workflows/terraform.yml"

permissions:
  contents: read

concurrency:
  group: terraform-dev
  cancel-in-progress: false

jobs:
  terraform-plan:
    name: Terraform Plan
    runs-on: ubuntu-latest

    permissions:
      contents: read
      id-token: write

    defaults:
      run:
        working-directory: terraform

    steps:
      - name: Checkout Repository
        uses: actions/checkout@v4

      - name: Configure AWS Credentials
        uses: aws-actions/configure-aws-credentials@v4
        with:
          role-to-assume: ${{ vars.AWS_ROLE_ARN }}
          aws-region: ${{ vars.AWS_REGION }}

      - name: Setup Terraform
        uses: hashicorp/setup-terraform@v3
        with:
          terraform_version: "1.14.0"
          terraform_wrapper: false

      - name: Terraform Format
        run: terraform fmt -check -recursive

      - name: Terraform Init
        run: terraform init -input=false -lockfile=readonly

      - name: Terraform Validate
        run: terraform validate -no-color

      - name: Terraform Plan
        run: |
          terraform plan \
            -input=false \
            -lock-timeout=5m \
            -out=tfplan

      - name: Upload Terraform Plan
        uses: actions/upload-artifact@v4
        with:
          name: terraform-plan
          path: terraform/tfplan
          retention-days: 1
          if-no-files-found: error
Understanding the plan job
Let’s examine the most important steps.
AWS OIDC authentication
permissions:
  contents: read
  id-token: write
The id-token: write permission allows GitHub Actions to request an OIDC token.
The AWS credentials action exchanges this token for temporary AWS credentials through STS.
No permanent AWS access keys are required.
Terraform validation
terraform fmt -check -recursive
terraform validate -no-color
These commands check Terraform formatting and configuration validity before generating a deployment plan.
Saving the Terraform plan
terraform plan -out=tfplanThe -out option instructs Terraform to save the execution plan to a file.
This file represents the infrastructure changes Terraform intends to perform based on the configuration and state at planning time.
Uploading the artifact
- name: Upload Terraform Plan
  uses: actions/upload-artifact@v4
  with:
    name: terraform-plan
    path: terraform/tfplan
    retention-days: 1
GitHub Actions artifacts allow files generated in one job to be accessed by another job in the same workflow run.
Because GitHub-hosted runners are ephemeral, files created in the plan job are not automatically available in the apply job.
Uploading the plan solves this problem.

Important: Terraform plan artifacts may contain secrets
Terraform saved plan files can contain sensitive values, including secrets referenced by Terraform configuration.
Marking a variable as sensitive prevents some values from being displayed in terminal output, but it does not guarantee that the saved plan file excludes them.
For this reason:
- Never commit tfplan files to Git.
- Restrict repository and workflow artifact access.
- Keep artifact retention periods short.
- Avoid placing credentials directly in Terraform configuration.
- Use synthetic or sanitized infrastructure examples in public repositories.
- Never publish actual saved plan files from sensitive environments.
Add the following to .gitignore:
.terraform/
*.tfstate
*.tfstate.*
*.tfplan
tfplan
crash.log
The .terraform.lock.hcl file should normally remain tracked in version control.
4. Configure GitHub Environment Protection
Now that the plan job is configured, we need a mechanism to prevent infrastructure deployment without review.
GitHub Environments provide deployment protection controls, including required reviewers and branch restrictions.
For this tutorial, we’ll create a protected environment named dev.
Step 1: Create the dev environment
Navigate to:
Get Mary Abassojo’s stories in your inbox
Join Medium for free to get updates from this writer.
GitHub Repository → Settings → Environments → New environment
Enter: dev
Click Configure environment.
Step 2: Configure required reviewers
Within the dev environment settings, locate Deployment protection rules.
Enable Required reviewers and select the GitHub user or team authorized to approve Terraform deployments.
Where supported, enable Prevent self-review to prevent the workflow initiator from approving their own deployment.
This provides an additional separation of duties between the engineer initiating an infrastructure change and the reviewer authorizing deployment.

Step 3: Restrict deployment branches
Under deployment branch and tag restrictions, configure the environment to allow deployments from the main branch.
This ensures that only workflows originating from an authorized branch can deploy to the environment.
Branch protection and environment protection complement each other.
For example, a branch ruleset can require a pull request before changes are merged into main, while the environment protection rule requires an additional approval before Terraform applies infrastructure changes.
These controls address different stages of the deployment process.
Important: GitHub’s availability and enforcement of required reviewers depend on the repository visibility and GitHub plan. Verify that your repository supports the protection rules before relying on them.
5. Create the Terraform Apply Job
Why apply the saved Terraform plan?
A common mistake is generating a new Terraform plan after approval.
For example:
terraform plan
terraform apply -auto-approve
This causes Terraform to recalculate the changes at deployment time.
If infrastructure configuration or state has changed since the initial review, the new plan may differ from what was previously inspected.
Instead, we’ll download and apply the exact saved plan artifact.
Step 1: Add the apply job
Add the following job under jobs: in the same .github/workflows/terraform.yml file.
terraform-apply:
    name: Terraform Apply
    runs-on: ubuntu-latest

    needs: terraform-plan

    environment:
      name: dev

    permissions:
      contents: read
      id-token: write

    defaults:
      run:
        working-directory: terraform

    steps:
      - name: Checkout Repository
        uses: actions/checkout@v4

      - name: Configure AWS Credentials
        uses: aws-actions/configure-aws-credentials@v4
        with:
          role-to-assume: ${{ vars.AWS_ROLE_ARN }}
          aws-region: ${{ vars.AWS_REGION }}

      - name: Setup Terraform
        uses: hashicorp/setup-terraform@v3
        with:
          terraform_version: "1.14.0"
          terraform_wrapper: false

      - name: Terraform Init
        run: terraform init -input=false -lockfile=readonly

      - name: Download Terraform Plan
        uses: actions/download-artifact@v4
        with:
          name: terraform-plan
          path: terraform

      - name: Terraform Apply
        run: |
          terraform apply \
            -input=false \
            -lock-timeout=5m \
            tfplan
The complete workflow now contains two independent jobs connected through the needs dependency.
Step 2: Understand the job dependency
needs: terraform-plan
This tells GitHub Actions that the apply job depends on successful completion of the plan job.
If the plan job fails, the apply job will not execute.
Step 3: Understand the environment approval
environment:
  name: dev
This is the configuration that connects the apply job to the GitHub dev environment.
When required reviewers are configured, GitHub pauses the job until an authorized reviewer approves or rejects the deployment.
Importantly, the protected job’s steps do not execute before the approval requirement is satisfied.

Step 4: Approve the deployment
Navigate to the workflow run in GitHub Actions.
Select Review deployments.
Choose the dev environment and approve the deployment.
Once approved, GitHub allows the apply job to proceed.

Step 5: Download and apply the saved plan
- name: Download Terraform Plan
  uses: actions/download-artifact@v4
  with:
    name: terraform-plan
    path: terraform
This downloads the plan artifact created by the earlier job.
Terraform then applies the plan:
terraform apply -input=false -lock-timeout=5m tfplanNotice that we are not running terraform plan again.
Terraform applies the saved execution plan generated by the first job.
This is the central design principle of our pipeline.
Step 6: Verify the deployment
After approval and successful execution, navigate to the AWS Console.

For this demonstration, open:
AWS Console → S3 → Buckets
Verify that the bucket defined in the Terraform configuration has been created.
What happens if Terraform state changes between plan and apply?
This is an important scenario.
Terraform saved plans are tied to the state snapshot used when they were generated.
If another Terraform operation updates the state before the saved plan is applied, Terraform may reject the plan with an error similar to:
Error: Saved plan is stale
The given plan file can no longer be applied because
the state was changed by another operation after
the plan was created.
This is an intentional safety mechanism.
Terraform prevents an outdated plan from being applied against a state snapshot that no longer matches the original plan.
The correct response is to generate a new plan and obtain approval again.
However, not every external infrastructure change updates Terraform state. Manual changes made directly in AWS may not automatically invalidate a saved plan.
This is why teams should minimize out-of-band changes, monitor drift, and use controlled deployment processes.
For additional protection, our workflow uses a GitHub Actions concurrency group to serialize deployments through the same workflow.
concurrency:
  group: terraform-dev
  cancel-in-progress: false
6. Testing and Troubleshooting
A successful pipeline implementation should include validation of both the expected deployment path and common failure scenarios.
Let’s examine a few issues engineers may encounter.
Scenario 1: OIDC authentication fails
Example error:
Error: Not authorized to perform
sts:AssumeRoleWithWebIdentity
Possible causes:
- The IAM trust policy references an incorrect GitHub repository.
- The OIDC subject does not match the workflow’s branch or environment.
- The AWS IAM OIDC provider is missing or incorrectly configured.
- The role ARN is incorrect.
- The GitHub workflow is missing id-token: write.
Resolution:
Review the IAM role trust policy and verify the subject expected for the job.
For a workflow running from the main branch without an environment:
repo:YOUR_ORG/YOUR_REPO:ref:refs/heads/main
For a workflow using the dev environment:
repo:YOUR_ORG/YOUR_REPO:environment:dev
These subjects are different, and the trust policy must account for the appropriate identity.

Scenario 2: Terraform Apply does not require approval
If the apply job starts immediately without waiting for approval, review the following:
- Confirm that the dev environment exists.
- Verify that Required reviewers are configured and enforced.
- Ensure the apply job references the correct environment name.
- Verify that the repository visibility and GitHub plan support the required protection rules.
- Check whether a bypass mechanism is configured.
Simply creating an environment does not automatically enable manual approvals.
Scenario 3: Terraform plan artifact cannot be found
Example error:
Error: Unable to download artifact(s):
Artifact not found
Possible causes:
- The upload and download artifact names do not match.
- The plan artifact was not uploaded successfully.
- The artifact expired or was deleted.
- The artifact path is incorrect.
Resolution:
Ensure both jobs use the same artifact name:
name: terraform-plan
Also verify that the plan file exists in the expected directory before uploading it.
Scenario 4: Terraform apply fails because the plan is stale
If Terraform reports that the saved plan is stale, the state has changed since the plan was generated.
Generate a fresh plan and repeat the approval process.
Do not bypass this protection by automatically generating a new plan inside the apply job.
Doing so would defeat the purpose of reviewing and approving a specific execution plan.
Scenario 5: Terraform initialization fails in the apply job
Each GitHub-hosted runner starts with a fresh execution environment.
The Terraform apply job does not automatically inherit the initialized Terraform working directory from the plan job.
Therefore, the apply job must run:
terraform init -input=false -lockfile=readonly
It must also use compatible Terraform and provider versions, the same backend configuration, and the correct working directory.
The saved plan is not a replacement for Terraform initialization.
Security improvements for production use
This tutorial demonstrates the foundation of a controlled Terraform CI/CD pipeline.
For production environments, consider the following improvements:
- Pin GitHub Actions to reviewed full commit SHAs instead of mutable version tags.
- Use separate AWS IAM roles for planning and applying infrastructure changes.
- Apply least-privilege IAM policies to each role.
- Require pull request reviews and status checks before merging infrastructure changes.
- Integrate Terraform security scanning using tools such as Checkov, Trivy, or a supported IaC security scanner.
- Use protected GitHub environments with required reviewers and deployment branch restrictions.
- Protect Terraform state using encryption, versioning, access restrictions, and locking.
- Use short artifact retention periods and restrict access to sensitive execution plans.
- Add explicit artifact integrity verification and consider external deployment authorization controls for high-assurance environments.
- Ensure that Terraform changes cannot be deployed through unprotected alternative workflows or overly permissive IAM roles.
One additional consideration: GitHub environment approval authorizes the deployment job, but it does not automatically mean the reviewer has inspected the full Terraform plan.
For stronger governance, generate a human-readable plan summary and make it available for review before approval. Keep the actual binary plan artifact private.
Final Thoughts
Securing Terraform CI/CD pipelines requires more than automating terraform plan and terraform apply.
A well-designed deployment workflow should establish clear authentication boundaries, provide visibility into infrastructure changes, and enforce appropriate deployment controls.
In this tutorial, we implemented a workflow that:
- Uses AWS OIDC to eliminate the need for long-lived AWS credentials.
- Separates Terraform planning and deployment into two GitHub Actions jobs.
- Preserves the Terraform execution plan as an artifact.
- Requires approval through a protected GitHub environment.
- Applies the saved plan rather than recalculating infrastructure changes.
- Uses remote state and locking to support safer infrastructure deployments.
The result is a more controlled and auditable Terraform deployment process that can serve as a foundation for multi-environment infrastructure delivery.
In a future article, we’ll extend this implementation to support multiple AWS environments, reusable Terraform modules, and additional security checks within the CI/CD pipeline.
If you found this walkthrough useful, follow me for more hands-on articles on Terraform, AWS, DevSecOps, GitHub Actions, and secure cloud infrastructure automation.
Terraform then applies the plan: