เข้าป่าคุมโทนด้วย Lightroom mobile | Forest Preset


เข้าฤดูฝนแล้ว ฤดูที่สายฝนโปรยปรายเป็นช่วงเวลาแห่งความสดชื่น เที่ยวหน้าฝนได้ความเขียวขจีของธรรมชาติ ภูเขาและผืนป่า เรามาลองแต่งภาพให้เหมาะกับช่วงเวลานี้กันเถอ
มาเริ่มกันเลย…
- เปิด Lightroom mobile ขึ้นมาเลยจ้า

จากนั้นเลือกรูปภาพที่เราต้องการ

2. เริ่มปรับแสงกันก่อนโดยเลือกที่ Light icon

ปรับค่าแสงต่างๆตามนี้ได้เลย
- Exposure -0.70
- Contrast -66
- Highlights +5
- Shadows +8
- Whites -6
- Blacks +20

3. เลือก Curve

จากนั้นปรับกราฟของแต่ละสีตามนี้
- สีขาว

- สีแดง

- สีเขียว

- สีน้ำเงิน

เสร็จแล้วกดปุ่ม Done ได้เลย
4. ปรับสีให้กับรูปภาพสักหน่อย โดยกดที่ Color icon

จากนั้นปรับ Saturation ลงนิดหน่อยเป็น -8

จากนั้นเลือก Color mix

ขั้นตอนต่อไปเราจะมาค่อยๆปรับสีกัน
สีแดง
- Hue -24
- Saturation -2
- Luminance -25

สีส้ม
- Hue -6
- Saturation 0
- Luminance -8

สีเหลือง
- Hue +10
- Saturation -8
- Luminance -47

สีเขียว
- Hue +15
- Saturation -68
- Luminance -28

สีฟ้า
- Hue +5
- Saturation -10
- Luminance 0

สีน้ำเงิน
- Hue -3
- Saturation -10
- Luminance -15

สีม่วง
- Hue +10
- Saturation 0
- Luminance 0

สีชมพู
- Hue +25
- Saturation -20
- Luminance 0

เสร็จแล้วคลิกปุ่ม Done ได้เลย
Get SANTIPING’s stories in your inbox
Join Medium for free to get updates from this writer.
5. ปรับ Effect กันอีกสักนิดนึง โดยเลือก Effect icon

จากนั้นปรับค่าตามนี้
- Texture -15
- Clarity +15

เสร็จแล้วจ้า ลอง Export ออกมาได้เลย

แต่เดี๋ยวก่อนตัวของคนดูมืดๆไปหน่อยรึเปล่านะ
Tips : Lightroom มี Feature ใหม่ที่ใช้ AI ช่วยให้เราสามรถปรับแสงเฉพาะจุดที่เราต้องการได้ มาลองเล่นกันดีกว่า
เริ่มต้นด้วยการเลือกที่ Masking icon

กดปุ่ม Add

จากนั้นเลือก Select subject

จากนั้น AI ก็จะดูว่าตัวแบบหรือคนอยู่ตรงไหน และเลือกเฉพาะส่วนที่เป็นคนมาให้เราแบบนี้

จากนั้นเราก็จะมาปรับแสงเฉพาะตัวแบบได้เลย ในส่วนนี้แล้วแต่ความชอบเลย สำหรับภาพนี้ก็ได้ปรับออกมาได้ประมาณนี้

เสร็จแล้วกดปุ่ม Check ได้เลย ไหนลอง Export ออกมาดูอีกที

เยี่ยม!!!
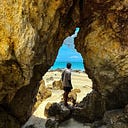
มาดูภาพก่อนปรับกับหลังปรับกัน

ทีนี้เรามาเซฟการตั้งค่าทุกอย่างที่เราปรับไปตะกี๊นี้เป็น Preset กันดีกว่า เพื่อที่จะได้สามารถนำไปใช้กับภาพอื่นๆได้ด้วย แถมประหยัดเวลาไม่ต้องมานั่งปรับใหม่
ขั้นตอนการ Create Preset
- เลือก Option icon

- จากนั้นเลือก Create preset

- ตั้งชื่อ Preset ของเราในที่นี้จะตั้งชื่อว่า Forest

- เสร็จแล้วกด Save ได้เลย
ลองเอา Preset ที่เราสร้างขึ้นมาไปใช้กับรูปภาพอื่นกันเถอะ
- เลือกรูปที่เราต้องการมาเลย จากนั้นกดที่ Presets icon

- เลือก User Presets

- จากนั้นเลือก Preset ที่เราสร้าขึ้นมา

- จากนั้นกด Save
เรียบร้อยง่ายขึ้นเยอะ เย้…..

จบแล้วหวังว่าจะมีประโยชน์กับทุกคนนะครับ :D